
The pile on the fridge door
Every household with a small child accumulates paintings. They arrive from nursery in folders, they cover the fridge, they migrate to a drawer, and eventually somebody has to decide what happens to four hundred pieces of sugar paper. Throwing them away feels wrong. Keeping all of them is not realistic. Printing is the middle path, and done well it turns a storage problem into something the child will actually want when they are twenty.
The work splits into three parts: capturing the artwork properly, choosing what to keep, and picking a format that suits how it will be used. None of it is difficult, but the order matters. Most disappointing results come from photographing badly and then trying to rescue the file later.
Capture it properly the first time
The single biggest factor in the finished print is how you got the image in. A crooked phone snap in evening kitchen light will never print well, no matter what you do afterwards.
Scanning
A flatbed scanner is the best option for anything flat that fits. Set it to a reasonably high resolution, because a small painting enlarged to poster size needs the extra detail. Scan in colour even for pencil drawings, since greyscale mode flattens the paper tone and loses the texture that makes the original feel real.
Clean the glass first. A speck of dust becomes a black dot at full size. Close the lid gently and, if the paper has curled, weigh it down with a book placed on top rather than pressing hard.
Photographing
Some pieces cannot be scanned: thick collages, anything with pasta or glitter, canvases and paintings larger than the scanner bed. For those, use a phone with these habits.
- Daylight, indirect. Near a window on an overcast day is ideal. Direct sun creates hard shadows and blows out light colours.
- Flat and square. Lay the artwork on the floor and stand directly above it. Shooting at an angle distorts the shape and no crop tool fixes it convincingly.
- Fill the frame. Get close enough that the artwork occupies most of the picture, leaving a small margin for cropping.
- No flash. It creates a bright hotspot in the middle and colour that does not match the original.
- Plain background. A white sheet or a plain floor. Patterned rugs make cropping harder.
- Check focus at full size. Zoom in on the photograph before you move on. Slight blur is invisible on a phone screen and obvious at print size.
Deciding what makes the cut
This is the part people avoid, and it is where the project usually stalls. A useful approach is to sort quickly into three groups rather than judging each piece on its own merits.
The first group is anything with the child in it: handprints, footprints, self-portraits, a drawing of the family. These date the piece and carry the most meaning later. The second group is work that shows a stage: the first recognisable face, the first written name, the phase where everything was a dinosaur. The third group is the visually strong pieces, the ones with bold colour or an accidental composition that genuinely looks good on a wall.
Everything else can be photographed and let go. That is the quiet advantage of this project: once a piece is captured properly, the physical original has done its job. Keeping ten favourites in a folder and a digital record of the rest is a far better outcome than a box in the loft nobody opens.
Note the details while you still remember
Write down the child's age and the date for every piece you capture, and any explanation they gave you at the time. In five years, the sentence about why the dog is purple will be worth more than the drawing. Keep it in a simple text file or in the filename itself.
Choosing a format
Different formats suit different intentions, and it is worth being honest about which one applies.
| Format | Works well for | Worth knowing |
|---|---|---|
| Photo book | a whole year or a whole nursery period | holds a lot without taking wall space |
| Framed print | one standout piece | treat it as art, not as a memento |
| Canvas | bold, colourful paintings | texture suits paint; fine pencil lines less so |
| Grid poster | many small pieces at once | a strong way to show progression |
| Calendar | twelve favourites, one per month | a straightforward gift for grandparents |
| Cards and stickers | thank-you notes and party favours | children enjoy seeing their work used |
If you are choosing between a book and wall art, consider who it is for. Wall pieces are for the household now. Books are for the child later. Many families do one of each per year and stop worrying about the rest. Practical guidance on book construction is in photo books: choosing binding, paper and the photos that make the cut, and the wall options are compared in personalised photo gifts.
Preparing files so they print well
A little tidying goes a long way, and it does not require design software.
- Crop straight. Use the straighten tool to square up the edges of the paper. A tilted artwork looks like an accident even when the drawing is charming.
- Decide about the paper edge. Cropping tight to the drawing looks cleaner. Keeping the torn edge of the sugar paper looks more authentic. Both are valid; pick one and apply it consistently.
- Fix the background, gently. Lifting the brightness slightly makes off-white paper read as white. Push it too far and the pale pencil lines vanish.
- Leave the colours alone. Resist the urge to saturate. Children's paint is already vivid, and increased saturation makes it look artificial.
- Check the size. A small scan blown up to a large canvas will look soft. If a piece is destined for a big print, rescan it at a higher setting rather than enlarging a small file.
Ideas that work better than they sound
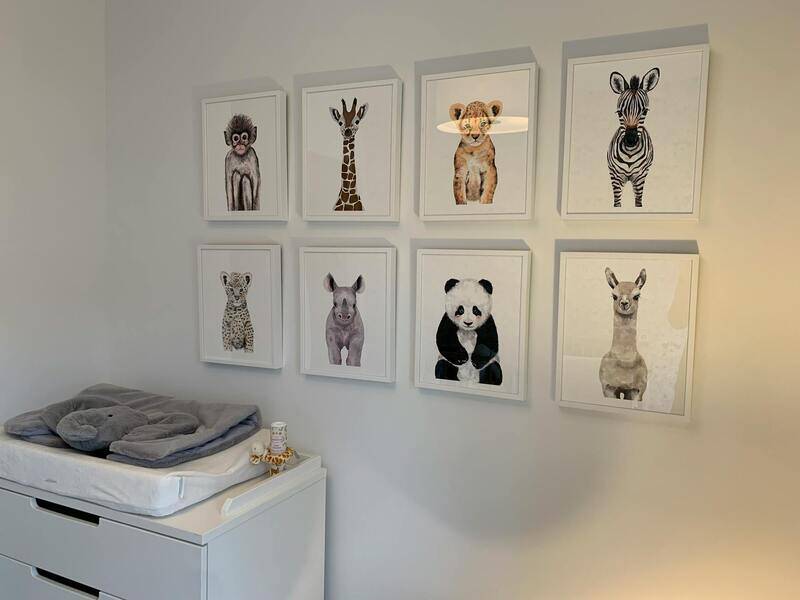
- The grid poster. Nine or twelve pieces from one year, arranged evenly with a consistent margin. Seen together they show development in a way no single drawing does.
- Matching the frame to the child. Simple frames in a consistent colour turn a scattered collection into a deliberate wall.
- A yearly book. One slim volume per year is easier to keep up with than a giant retrospective you never start.
- Gifts for relatives. Grandparents genuinely want these. A calendar or a small framed print solves the birthday question for years, and photo calendars that get used all year covers how to lay one out.
- Wrapping paper. A repeated pattern of one painting makes a present unmistakably from that child.
- Stickers and labels. A drawing turned into a sticker sheet is a small thrill for a five-year-old, as described in custom stickers and labels.
Keeping the files somewhere you will find them
A folder per year with the child's name and age in the title is enough structure. The mistake to avoid is leaving everything in the phone camera roll, where it disappears among ten thousand other pictures. Move the captured artwork into its own folder the same evening you photograph it, back it up to a second location, and the project stays alive. Skip that step and next spring you will be scrolling through last July looking for a painting of a boat.
Involve the child
Let them choose some of the pieces. Children pick differently from adults, often for reasons that have nothing to do with how the drawing looks, and those reasons are part of what you are preserving. Ask them to sign the ones they want kept, which gives you a dated signature and makes the selection feel like a decision rather than a cull.
It also softens the part where the physical originals leave the house. A child who has chosen ten to keep and watched the rest be photographed is far more relaxed about the recycling bin than one who finds out afterwards.
How we can help
We print artwork onto everything from small cards to large canvases, and we check files before printing rather than after. If a scan is too small for the size you have asked for, we tell you and suggest either a smaller format or a rescan. If a photograph has a colour cast from indoor lighting, we can flag it so you can retake it in daylight.
Have a look at the options under custom online printing, or across general printing. There are more ideas in turning photos into gifts people actually keep. If you would like a file checked before you order, send it through our contact page, and there is more about us on the about page.
The short version
Capture well first: scan flat pieces on a clean bed at a generous resolution, photograph the rest from directly above in indirect daylight with no flash. Sort quickly into pieces with the child in them, pieces that mark a stage, and pieces that simply look good. Record the age and date while you still remember. Crop straight, lift the background slightly and leave the colours alone. Then pick a format that matches the intention: a book for later, wall art for now, a calendar for the grandparents. And let the child choose some of them.
